
The eyes have it this season!

If the blog and street style avenues are to be believed, Kenzo's eye prints - and anything resembling them, as I'm sure the high street will be quick to point out - are the motif to be seen with right now, so I thought I'd share a nifty little tip for recreating the pattern.
You will need...
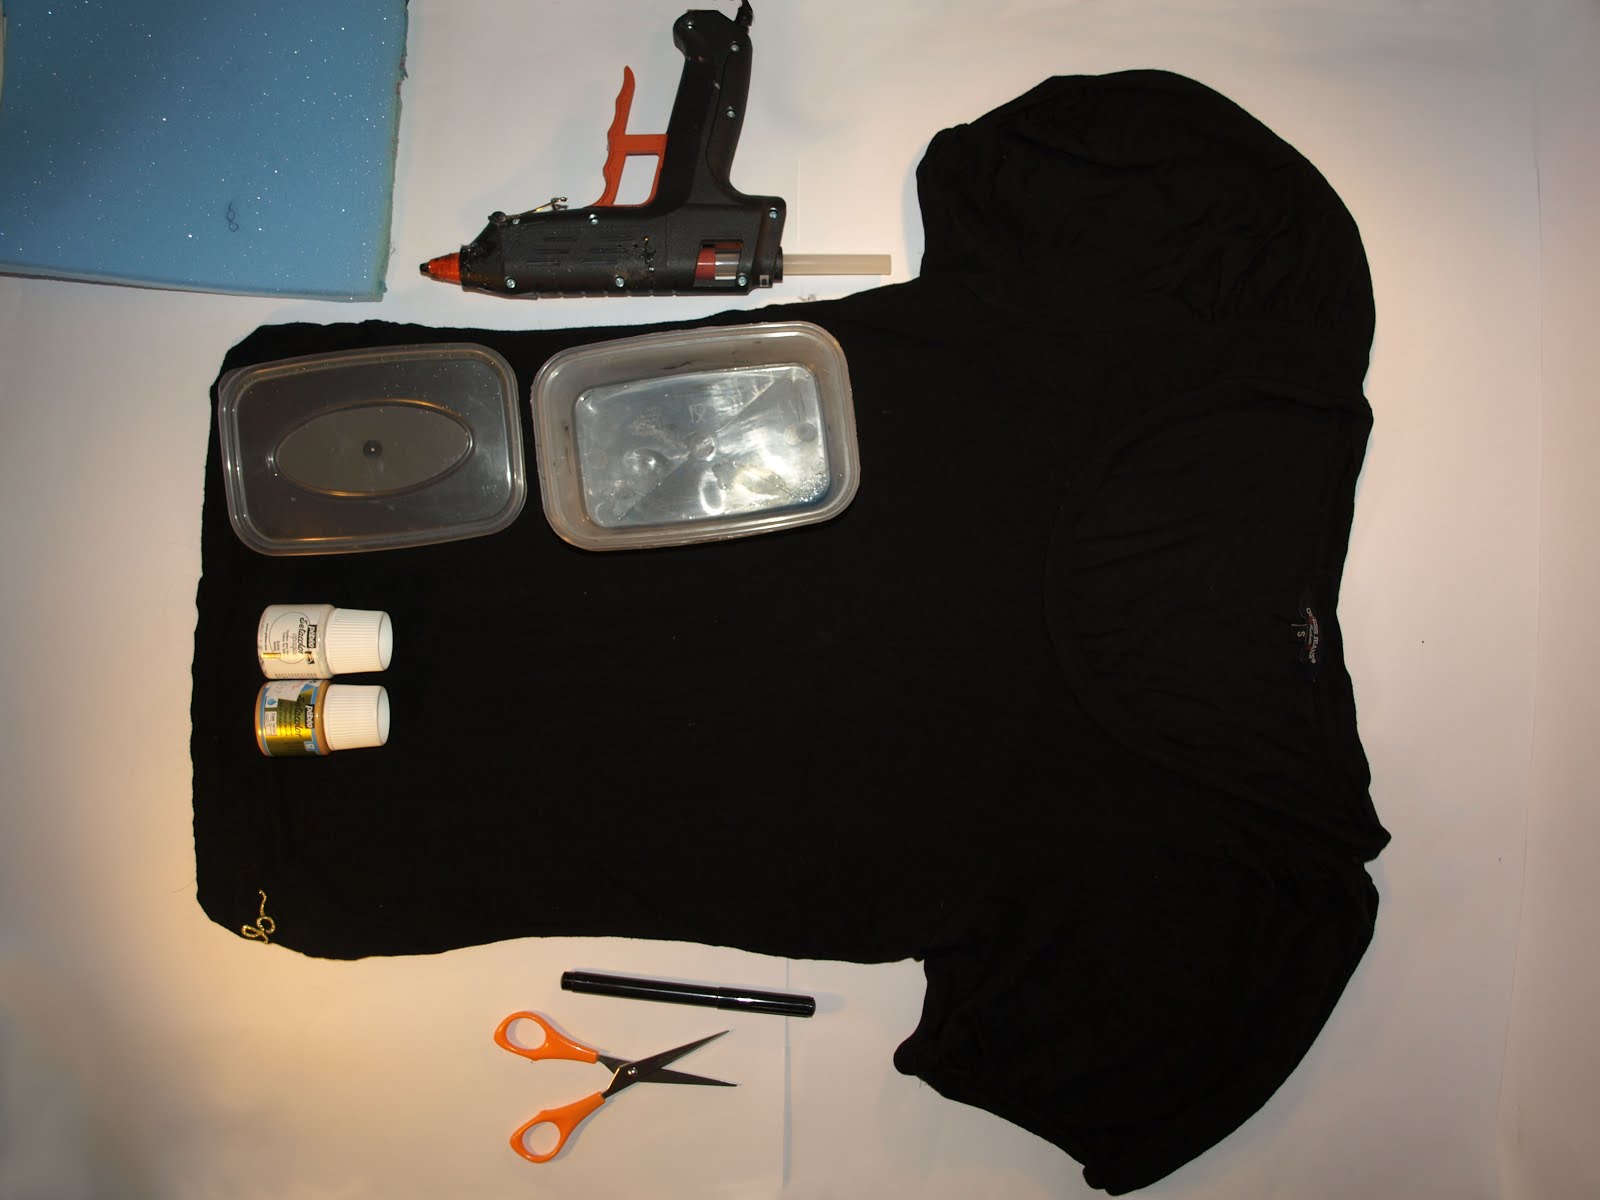
NB: My foam was about 1cm thick.
Difficulty

Quite easy
...But not as easy as I thought before I tried it. This isn't a particularly long or complicated project but it's more reliant on skill than I initially thought. As ever, I can guide and advise you so that you don't find it so hard. You can also practise on some scrap fabric to get the feel.
Time
An evening...well, a few hours. Sorry, I got a bit lost in the project so I wasn't counting!
Timings for this project depend largely on the number of eye motifs you're looking to do; if you're only doing one it will take less than an hour but if you're covering your top it will take significantly longer.
Eye-eye!

Cut out the circle and eye shapes into your foam using the above template. I made my circle about 9cm in diameter and the eye about 4cm from the tips of the eyelash.

Now to craft some stamps! Cut the lid of your box into smaller pieces that cover your foam shapes and glue the shapes to them.


Repeat this process until your design is complete.

Loving the stamp action? Check out this tutorial.
No comments:
Post a Comment