Sunday 27 January 2013

Malan-dream-o

Digging the digital trend with geometric patterns and pastel hues, chez Catherine Malandrino.


£23.20

You will need

Pebeo "Setasilk" water-based silk paints (priced at around £3.95) in:

Light blue

Light pink (I chose orange instead but that was personal taste)

Purple

Dark green

White knitted dress, jersey dress or jumper (mine cost £5, Primark)

About half a metre of white calico fabric

3 small glass jars

Hair dryer

Paint brush

Half a metre of Bondaweb

Iron and ironing board

All-purpose scissors


Difficulty


Quite easy

No particular technique or skill required for this one, it's just really easy to make a mess of your work and chosen work space if you're not especially careful and attentive to spillages.

Time

5-6 hours


When worlds "kaleidoscope"...


Cut your calico into about 30 small strips (give or take, 25 x 5cm but it doesn't have to be exact), divide them into 4 sets and paint each set with a small splodge of silk paint, like the one in the picture above.


Dunk your strip into your paint and water mix for a few seconds - tops - or as quickly as possible. I just set the above washing line arrangement up to demonstrate quantities and make it easier to photograph, but I recommend you do your dunking over a sink rather than on a desk or soft furnishings as it's going to spill. Relax - the paint's water soluble!


After you've done each piece, place them in a large, easy-to-wipe-clean area, like a shower, where I left mine. The silk paints mix easily and well so any splattering and spillages onto other pieces can be a bonus.


Take each piece - I took 2 at a time for the sake of speed - and dab it with a tissue, giving particular attention to the paler side, so as to enhance the ombre look.


Blast each piece dry with a hair dryer.


Iron your pieces onto your Bondaweb.


Cut your pieces out.


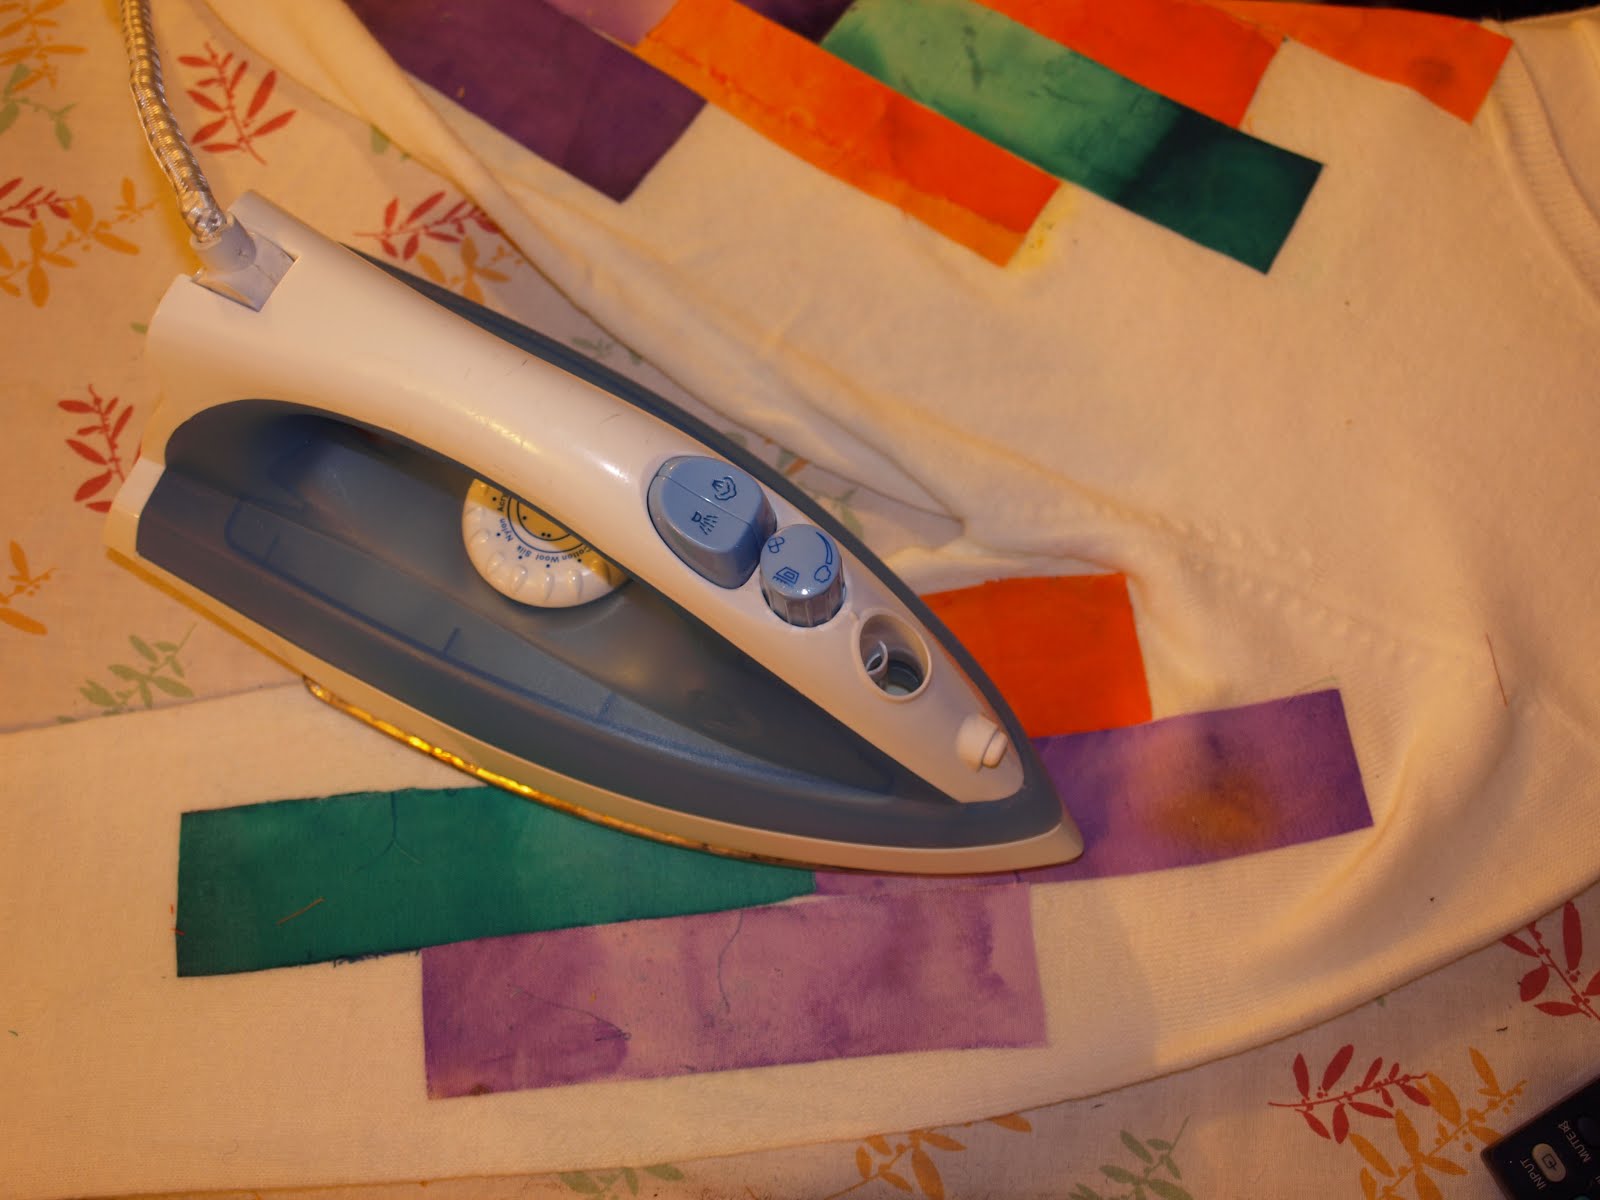
Iron them in place, Bondaweb-side down.

Result!


Thursday 24 January 2013

For Your Inspiration: Digital Love


A new year's resolution - ahem! - I mean, blog feature I'm setting out to do for my midweek update is a trend and inspiration collage of all the potential projects I see in on-trend items. This 90s-rich, retro-digital trend of pixels and neons was quite a sentimental one for me, reminding me of the technology of the decade, the games, the colours (can we bring back neon slap bracelets? Scrunchies can stay behind) and the colour separation, as is the case in the Catherine Malandrino dress on the left. Genuinely, that reminded me of doing chromatography in chemistry class, for which I dangled strips of coloured coffee filter paper in water, watched as the dyes separated and thought "If DIY fashion bloggers dared do the same..." Okay, the last point was a more creative, less accurate take on my memories but if they come into fruition, you know where you'll hear it first...

Sunday 13 January 2013

Izzy Whizzy - How to DIY a pair of Isabel Marant Blackson Boots

Give fashion rut the boot, bohemian style with Isabel Marant's Blackson beauties.


Now that 2013's well and truly upon us, I thought I'd mark the occasion as being a decade since the Vogue debut of designer Isabel Marant, a designer whose trademark bohemian detailing arose from customising old army jackets and other clothing remnants in her bedroom. No, I can't think who else could possibly spring to mind, either!

You will need

Black pointed ankle boots with high or conical heels

About half a square metre of black leather

Sewing machine with a leather needle

Gold gel pen

One reel each of red and white thread

Craft mount

Pattern paper and pins

Gemstone glue

Scalpel

Small all-purpose scissors


Time

About 4-6 hours. I took much longer because I did certain things wrong and learnt the hard way – you’ll be pleased to know I’ve adapted the instructions of this entry accordingly. All will become clear later on. I’ve also included some free pattern pieces which took me ages to trace so that’s another four hour saving for you, or thereabout.


Difficulty


Moderate


Again, going on the method I just used, my scissor dial would be way onto the right-hand side as it proved very fiddly. Again, trust my tried and tested advice for this one and you should be fine.


 These boots were made for crafting…


Trace out the above shapes twice onto your leather using a gold gel pen or a similar opaque marker.


Machine sew along or just inside your lines, first in red then in white. DO NOT cut out your pieces first. I didn’t put that in capitals for nothing. I did exactly that and lived to regret it. It makes sewing the lines super fiddly and near-on impossible.

Once you’ve sewn your lines in place, cut your pieces out using your scalpel, leaving ample space for your sewing lines at the edges so that you don’t cut into them.


Cover the back sections of one of your boots with pattern paper and trace around the edges. Fold your leather in half, pin your pieces down and cut them out. Craft mount your leather to your boots. If you get any stray corners that don’t stick, dab them with gemstone glue, rather than spraying (and ruining) your whole boot.


Craft mount your top stitched pieces to your boots, ensuring they’re in the same place on each one.


Friday 11 January 2013

Haute Mesh

Pick a knit that will add a touch of colour in the winter gloom, courtesy of Kenzo.


You will need

A grey coat (Mine cost £8 from a charity shop. It's more like a long, hooded cardigan, meaning it doubles nicely as a slanket)

Needle and thread

4mm crochet hook

Two 100g balls of Bonus DK mustard yellow wool (£1,69 each at Hobbycraft), one in grey and one in black

Lots of time and patience

Difficulty

Moderate

I'm going to say moderate because this one all depends on your chops with crocheting. Master the triple crochet stitch and you're laughing.


Time

I'm going to say 2 industrious, balls-to-the-wall weekends. Totting up the time I recall spending on the project, my ball-park figure would be 25-30 hours so spreading that over 4 weekends is probably better for your sanity than the way I went about it!


Mesh it up!

In order to get a good grid effect that has the slight vertical texture of the Kenzo original, I used the triple stitch on its side,on all pieces except for the striped cuffs.

Crochet two of each of the following pieces. Print or copy them to the dimensions specified and rotate each piece 90 degrees (except for the striped cuffs) so that the triple stitch is on its side on the final garment.


Join your pieces together at the side edges (i.e. the short ones) so that they form tubular shapes.

Join the black and grey pieces together, with the grey at the top and the black at the bottom, using a normal crochet stitch.

Join the top edges of the grey panels to the top edges of your yellow sleeves, again, using a normal crochet stitch.

Join the striped cuffs to the bottoms of your yellow sleeves.


Mark out four diagonal lines on the sleeves, each one for stitches wide and four stitches apart from the adjacent lines. cover your lines with a normal crochet stitch in black (NB: don't go along the tops like I did. It's not how the original looks and it's a nightmare to get it to look straight and neat)

Using a needle and thread, hand-stitch your sleeves in place at the shoulders and cuffs. You may need to stretch out your garment a bit as you stitch, so that it ruches when you let go. The original's sleeves have a draped, baggy effect, so that was how I copied them with mine


.

Sunday 6 January 2013

Chic Teaser: Hip Hip Crochet

A couple of 'grams from my latest project - which I'd have finished by now if I weren't exhausted, in agony and seeing out a frustrating weekend - any ideas yet?

Wednesday 2 January 2013

DIY-scapades

Quick update on my latest DIY neon jewellery obsession: I thought I'd share my latest 20-minute project with you. I know this is something like my 3rd neon gem-inspired tutorial so I'll keep this one short and diaristic. .After happening upon some bank-breaking 50p nail wraps from Primark, I felt the urge to cut some of them into tiny strips, insert then into the centres of 16 clear faceted teardrop beads and 2 clear faceted round ones and glue gun them to some earrings I picked up on the sale in Forever 21. I used gemstone glue initially but changed to a glue gun which I'd definitely recommend more. I'm hooked on the 90s-throwback neon trend, right now. Yes, the 90s might have been one of my personal worst decades for music (the latter half, anyway) and I couldn't really afford much of the fashion, but thankfully, I believe in second chances!